Galileo Secured Credit Workflows
This guide contains workflows that illustrate the processes for creating and managing Galileo Secured Credit.
Secured credit account structure
This flowchart is an example of how you might structure new accounts for a Three-Account Galileo Secured Credit product. Your Galileo representative can help you build a process that works in your own system. Steps are described below.

- A new customer requests a secured credit account.
- You send the Create Account endpoint to create the primary account.
- You send the Add Account endpoint to create the credit account and link it to the deposit account.
- You send the Add Account endpoint a second time to create the secured credit account and link it to the deposit account.
- Galileo sends you the
CAPP: app_completedevent for the primary account. - The account holder deposits funds into the secured credit account.
- Galileo sets the account credit limit.*
- Galileo sends the charge card to be embossed.
- The customer receives the charge card and requests to activate it.
- You send the Activate Card endpoint to activate the charge card. (See Card activation in Setting Up a Card Program for information about other activation options.)
*For Galileo clients that implemented Galileo Secured Credit prior to October 2023, you send the Set Credit Limit endpoint to establish the credit limit.
Secured credit account structure with authorized users
This flowchart is an example of how you might structure a product with a secured credit account with authorized users. Your Galileo representative can help you build a process that works in your own system. Steps are described below.
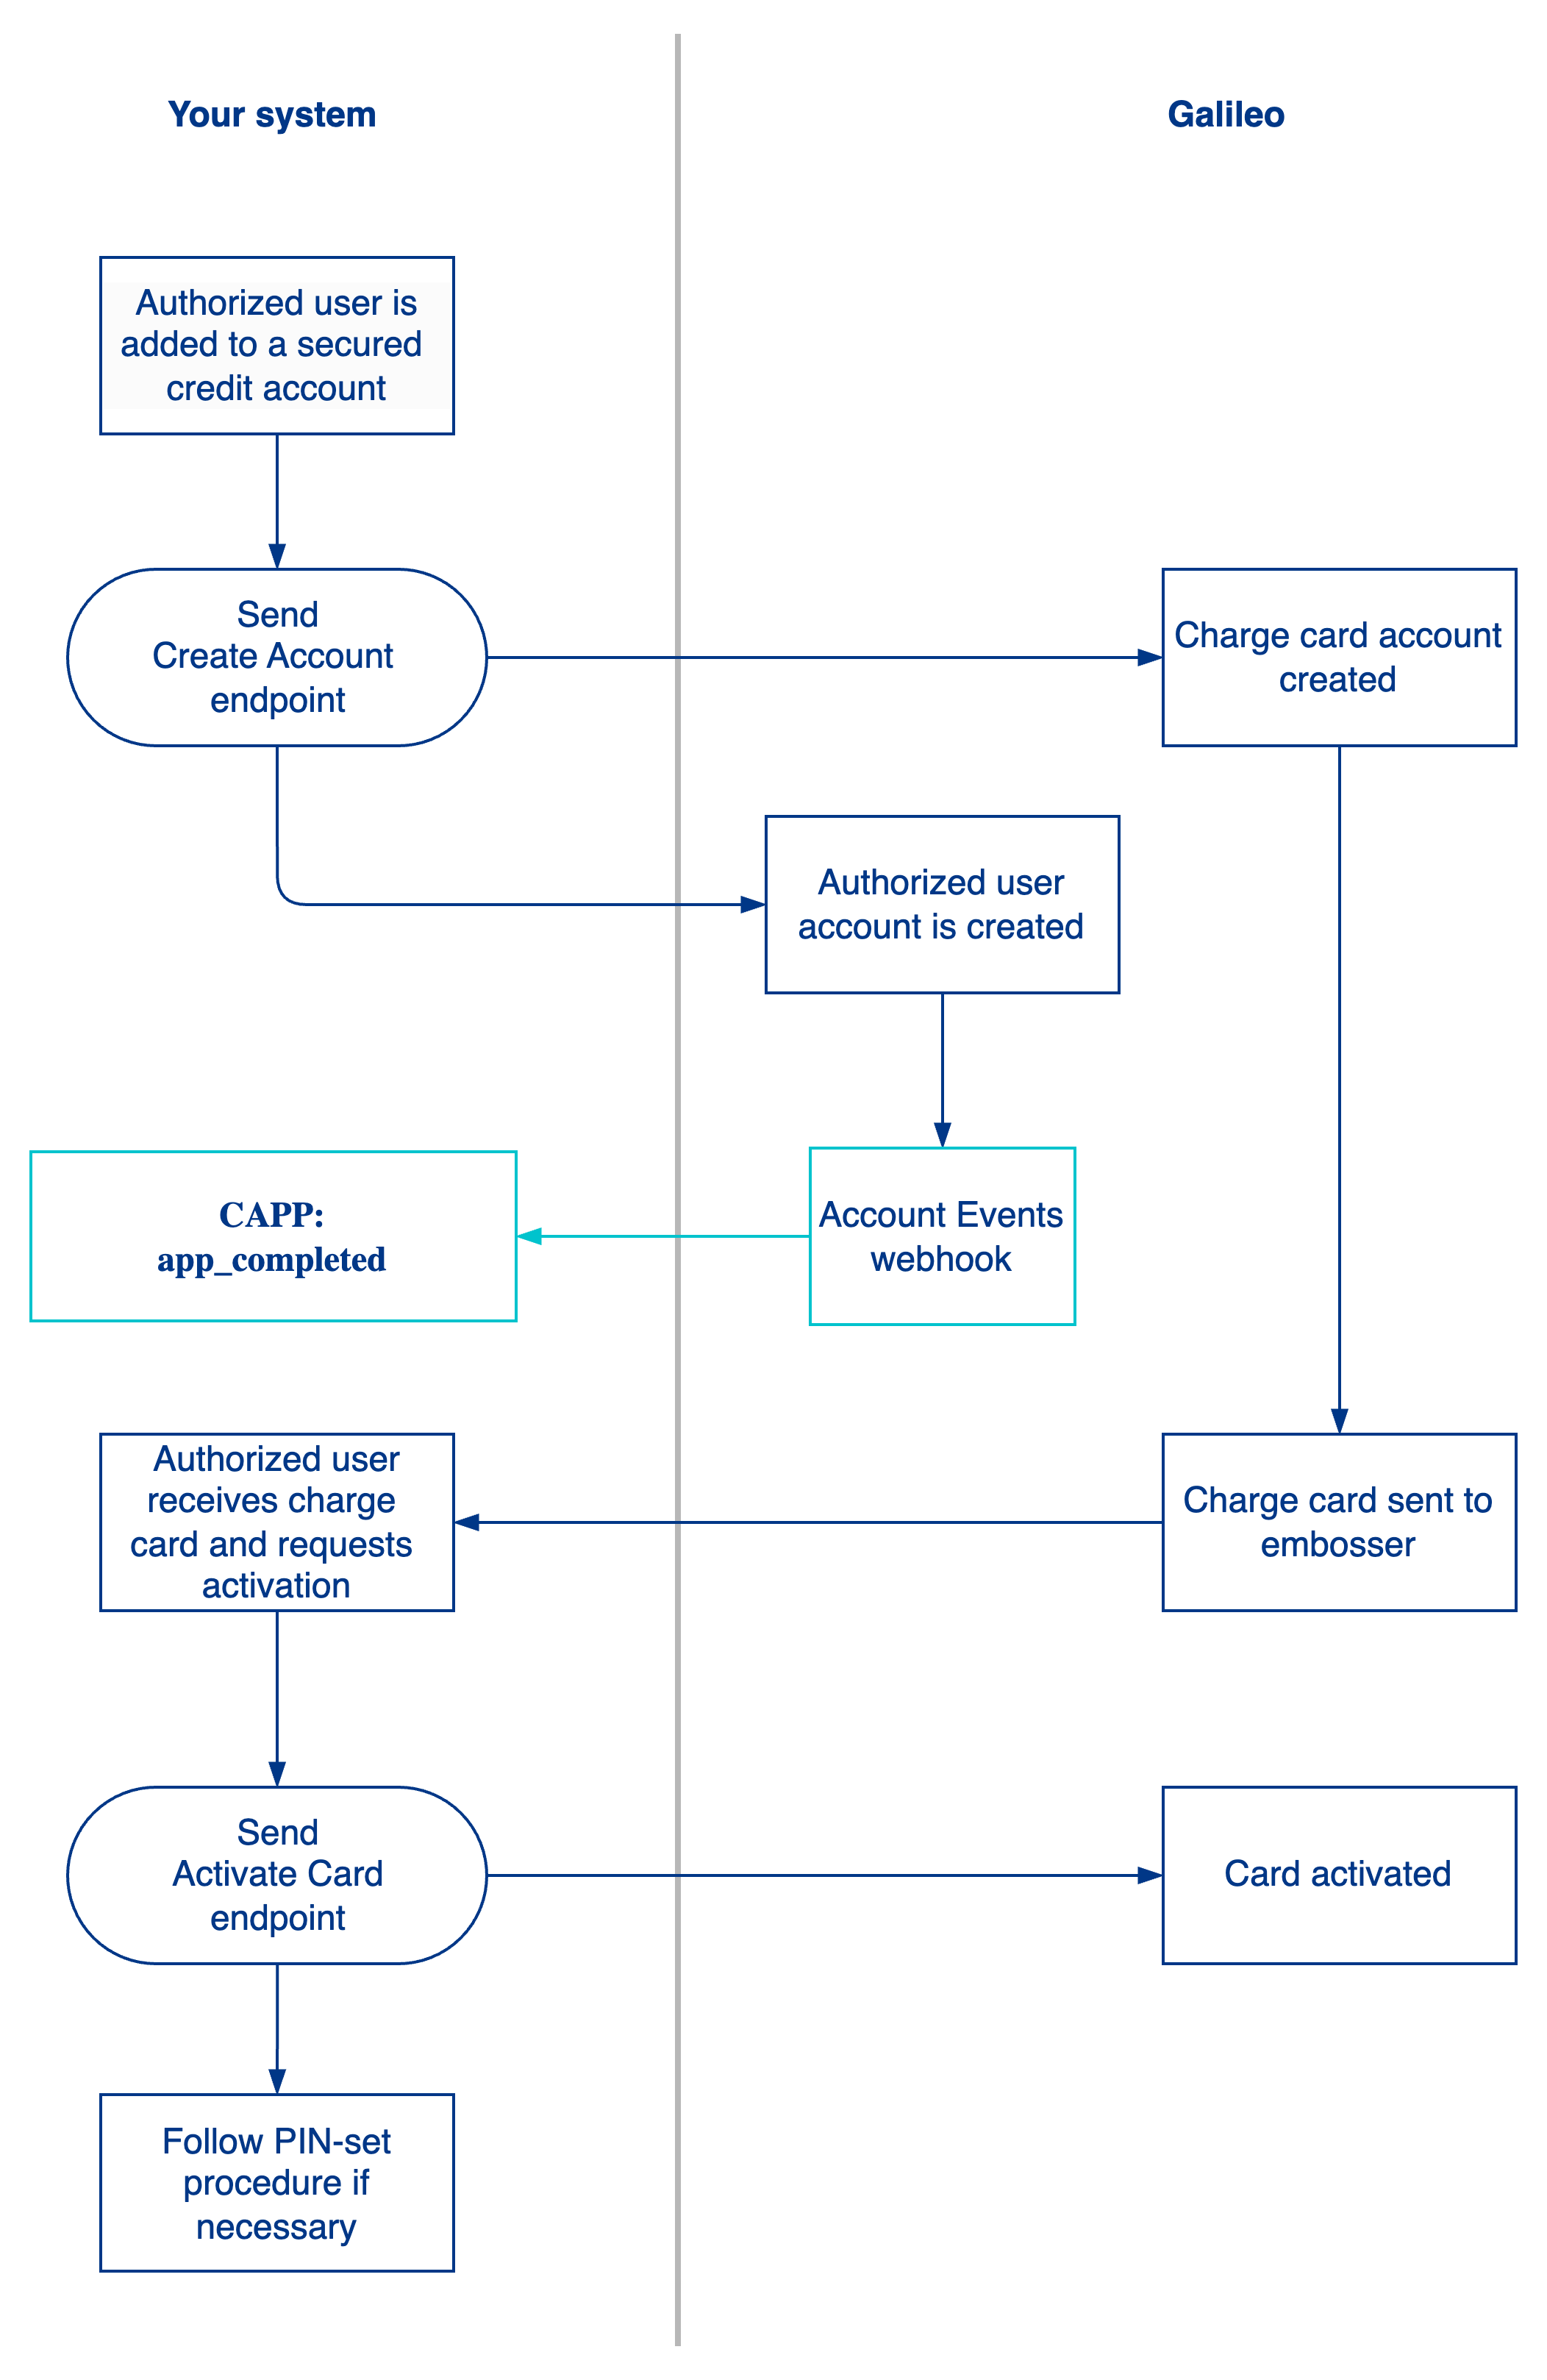
- A new authorized user requests a secured credit account.
- To create the authorized user account, send the Create Account endpoint with these values:
authorizedUser: 1sharedBalance: 1primaryAccount:PRN of the primary account- Only "reportable" authorized users get the key credit-building benefits of a secured credit product. You must collect the authorized user's PII, specifically
dateOfBirthand social security number(SSN), when you call Create Account to ensure they are reported in the Metro 2 file. See Customer ID Types for details on collecting the SSN.
- Galileo sends you the event for the authorized user account.
- A charge card is created and Galileo sends the card order to your embosser.
- The customer receives the physical charge card and requests to activate it.
- You send the Activate Card endpoint to activate the charge card (see Card activation in Setting Up a Card Program for information about other activation options.)
- Follow PIN-set procedure if your card has a PIN.
Secured credit authorization and settlement
This flowchart illustrates how a Galileo Secured Credit transaction is authorized and settled. Steps are described below.
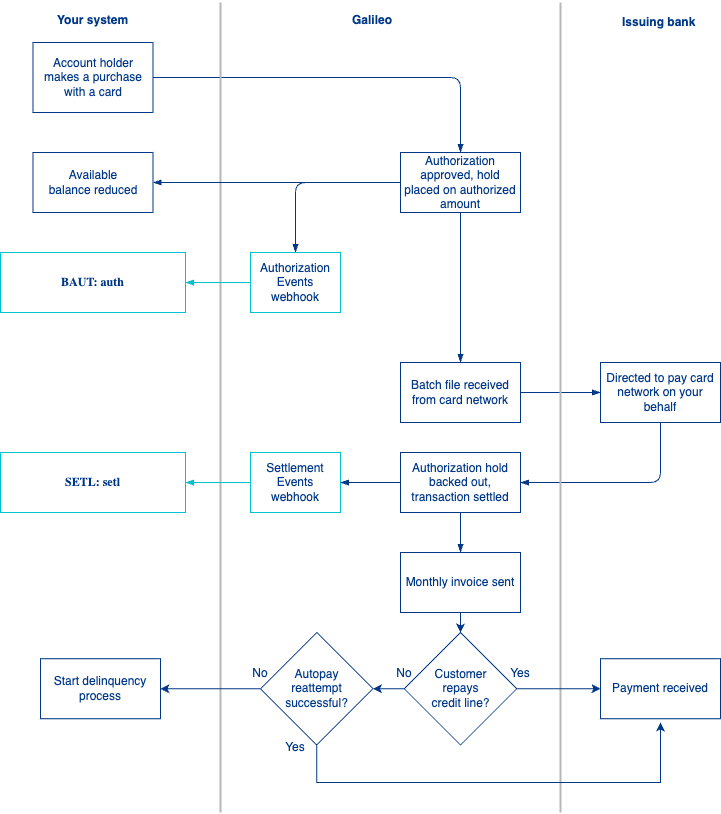
- An account holder makes a purchase over card network rails and the card network sends an authorization request.
- You or Galileo approve the authorization request based on the line of credit.
- If the authorization request is approved, Galileo places a hold for the authorized amount. The account holder’s available balance is reduced on the collateral account.
- Galileo sends the
BAUT: authevent with the available balance in theopen_to_buyfield. - The card network sends the settlement batch file.
- Galileo directs the issuing bank to pay the card network.
- Galileo backs out the authorization hold and sends you the
SETL: setlevent. - The monthly invoice is sent to the account holder.
- If autopay is enabled for a cardholder’s account, Galileo transfers the full balance of the previously calculated billing cycle from the collateral account on the scheduled date.
- Galileo sends you the autopay_success_event.
- The issuing bank receives repayment.
- If the account holder cannot pay down the credit limit from the primary account, funds may be recovered from the secured credit account.
Collateral account funds flow
These illustrate the movement of funds into and out of the collateral account, and the resulting credit limit adjustment. This only applies to Two-Account and Three-Account. The flow of funds between accounts is automated for Dynamic Funding.
Move funds into the collateral account

- The account holder requests to move funds from one account into the collateral account.
- You send the Create Account Transfer request.
- Funds are transferred and the secured account balance increases.
- Galileo updates the credit limit based on the funds in the secured account.*
*For Galileo clients that implemented Secured Credit prior to October 2023, you are responsible for updating the credit limit. See Set Credit Limit endpoint.
Move funds out of the collateral account

- The account holder requests to move funds out of the collateral account and into another account.
- You send a Create Adjustment or Create Payment request.
- Funds are adjusted and the collateral account balance decreases.
- Galileo updates the credit limit based on the funds in the secured account.
*For Galileo clients that implemented Secured Credit prior to October 2023, you are responsible for updating the credit limit. See Set Credit Limit endpoint.